Friday, 21 June 2013

More foundation piecing for Linus

I was keen on improving my technique of foundation piecing so I have tried several more blocks. I think I have almost got the hang of it. I started with the house block. It would have looked better with a more cottage like brick weave but this was the only brick fabric I could find.

Next I tried out the flower. This was much easier than the house, I used up some scraps of fabric from my red stash.


Lastly, I tried the June Rose block. This is my favourite! I used the same fabric as the mouse I made earlier this week.


Monday, 17 June 2013

A little mouse!

One of the ladies from Drayton patchwork and quilters showed us how to make a cute little mouse! I am quite pleased with mine. However, the green eyes make it look a bit like an alien! A great way to use up some scraps. 


First attempt at foundation piecing

I have recently joined Drayton patchwork and quilters group. We are making blocks using foundation piecing method. These blocks will be later joined to make quilts for the charity Linus. Here are my first attempts!


Thursday, 16 May 2013

Hand spun Alpaca

I was given some raw Alpaca fleece by a friend and I have finally got around to processing and spinning it. I skirted the fleece (removed leaves and other Debris) and washed it using treseme shampoo and warm water: the fleece was put in an underwear laundry bag and  soaked for 30 minutes in soapy water, then transferred to clean water of a similar temperature for a further 30 minutes, this rinsing process was repeated twice more. I dried the fleece on a clothes maiden laden with tea towels, the fleece took about 48 hours to dry.

Once dried I used hand carders to align the fibres to form a rolag. I spun a thin yarn (worsted style) with an s twist and plied with a z twist. I am really pleased with the result! Finally a relatively even thickness! I can't wait to knit with it. I am thinking of making a shawl. Here are some pictures.

Fleece:


Plied yarn on the bobbin

Yarn on the niddy noddy:

Washed and ready to knit!


Saturday, 11 May 2013

Quilted cutting mat bag

Quilted cutting mat bag- side 1
Quilted cutting mat bag siide 2

In this project I aimed to try out a few new different patchwork blocks. I used 8 inch square blocks, quilted them individually a sewed them together using the quilt as you go method. In retrospect I would have used thinner batting as it does bulk the bag out and make it a lot harder to piece together. There are 30 blocks in total to cover an A1 size cutting mat. Once I had joined them all together I added a strip to the top edges of the bag to make it large enough for the cutting mat and top sewed the edges together. Here are a few close up examples of the blocks.


For the sides of the bag, I used a simple binding technique, where I sewed the two parts of the bag together with an additional strip which was folded over to cover the raw edges and finally hand sewn into place. The straps were 1.5 inch strips lined with heavy duty interfacing, finished with a top sewn edge. Sewn into place in the top seam as well as the seam below to strengthen it.


 I am contemplating adding pockets on the inside of the bag for ruler's. I have not quite decided yet though!


Monday, 29 April 2013

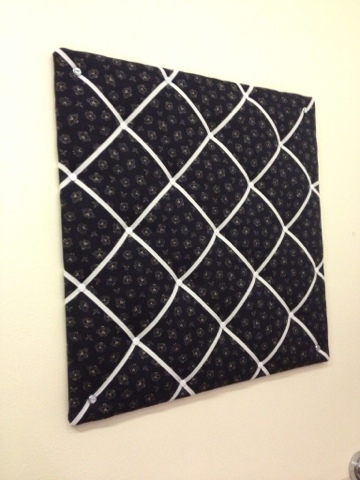
Quilted Notice Board

I have been meaning to do this for ages as there was a large expanse of wall in my kitchen and lack of any sort of space to place reminders!

I cut out a piece of 4mm MDF 50x50cm square, and drilled a hole in each corner (so it could be attached to the wall). I then layered batting and owl print material and used a staple gun to attach the material to the back side of the MDF. I carefully placed elastic at equal intervals across the panel, attaching them on the reverse using the staple gun. To prevent the elastic from moving too much I pushed thumb tacks into the MDF where the elastic crossed over. Lastly, I cut holes in the material where I had drilled the MDF earlier and I attached the board to the wall using capped screw washers and screws.

I was really pleased with the result and was delighted that I used a full fat quarter of material with no waste!!


Saturday, 27 April 2013

My first quilt

I have always wanted to make a proper quilt but I had never got around to having a go. Thanks to a couple of lessons with a very talented lady, Tricia Vint (thepiedpedlar.blogspot.com), I was able to produce my first patchwork quilt. The fabric is from a moda charm square pack plus a few fat quarters of my favourite designs. I used the quilt fab application on the iPhone to decide on the design and ended up choosing the kings crown and the lemoyne star blocks in alternate configuration. I am really pleased with the pattern and the colours, but my quilting skills still need to be perfected! I was a little lazy at the end with the binding though and used pre-made bias binding, i should really have done it properly but i just could not wait to see the finished product! A really fun make.